The Easiest Homemade Bread

DSC 5896 1024

I made bread.  Homemade bread from scratch.  Yeast was involved.

The crazy part is I make this bread all the time, which is a true feat.  I love to cook, but I don’t bake.  Ever.  I’ve never made cookies.  I’ve never made a birthday cake.  I’ve never made banana bread. (I did make my husband cakeballs . . . One time . . . Because I’m in love with him.   But it will probably never happen again if I’m going to be honest.)

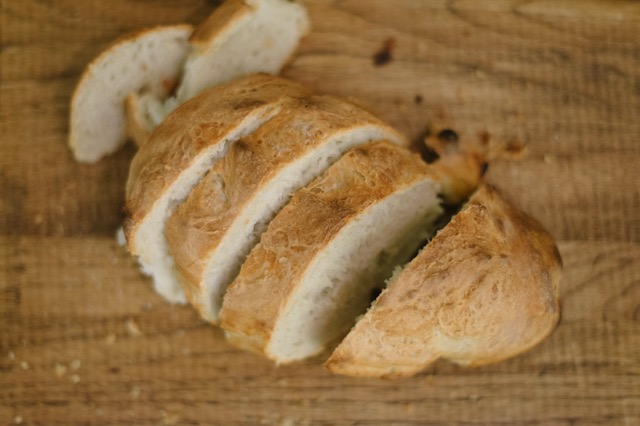
The only reason I make this homemade bread is because it fits into my present day criteria: Prep is less than 5 minutes and I can make the whole thing while holding a human.  It is so easy.  Once the dough sits in the fridge for one night, I can bake a single loaf of bread anytime I want in 30 minutes. Then my house smells like heaven, and I have warm bread that I slather with butter and honey.  

DSC 5895 1024

Don’t take my word for it.  Read the original recipe here.  The writer is much funnier and knowledgable than I am.  

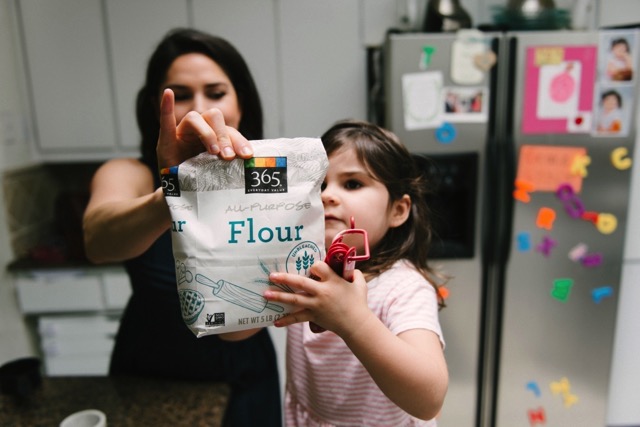
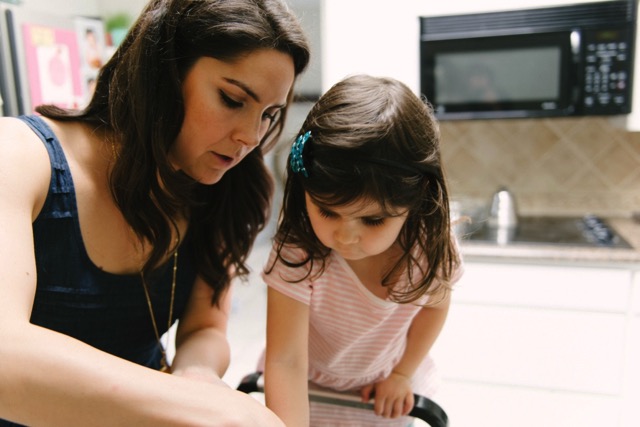
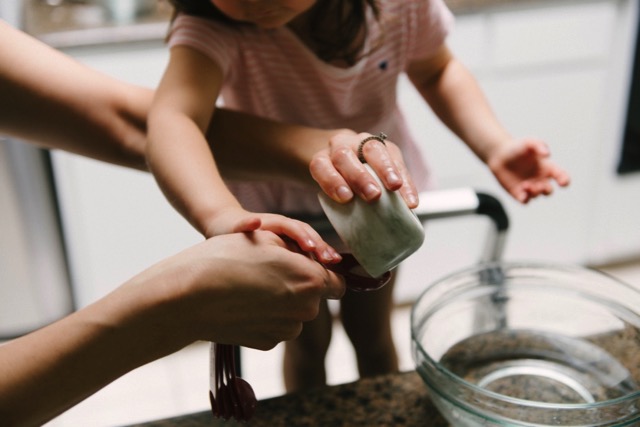
Now Grace and I will break down the ingredients and the few simple steps.  (And in case you think I’m the kind of person who bakes with their toddler for pleasure . . . the internet is a lie.  Grace wanted to be in the pictures once she saw John grab his camera.  She spilled half the flour and most of the yeast.  I tried not to yell.  Most of the time I mix the dough together at night after the kids go to bed, and then make a loaf in the morning.)

The ingredients: Yeast, Salt, Flour.  That’s it.  (Oh and water.)

Thumb DSC 7216 1024

Thumb DSC 7217 1024

Thumb DSC 7218 1024

And now for the steps:

1.  Pour three cups warm water into any large, resealable container.  I used a large glass bowl that has a lid.  Large tupperware works great too.

Thumb DSC 7227 1024

2. Add one and a half tablespoons salt.  This photo is riveting, I know.
Thumb DSC 7230 1024

3. Add one and a half tablespoons of dry active yeast and stir until completely mixed.  Wait about two minutes until the yeast starts to make little bubbles.

Thumb DSC 7244 1024

Thumb DSC 7238 1024

Step 4: Add six and a half cups flour.  Dump it all in at the same time. And stir it all together until a loose dough starts to form (I do this with my hands.)

Thumb DSC 7261 1024

Thumb DSC 7278 1024

Step 5: Loosely cover the bowl and let it sit out for 1-2 hours while it rises.  We didn’t get any pictures of this part, because we were putting the kids to bed.  After John and I watched a few TV shows, I squished the dough into the bowl because it started to balloon out.  Then I sealed the lid tightly and threw it in the fridge. 

Step 6: Whenever you want (the dough will last up to 3 weeks): Break off a hunk of bread and throw it on a greased cookie sheet.  Bake at 450 degrees for 30 minutes.  Then I crank it up to 500 degrees for another 5 minutes if it doesn’t look crispy enough.  (Reseal the remaining dough and let it wait in the fridge until you get your next bread craving.)

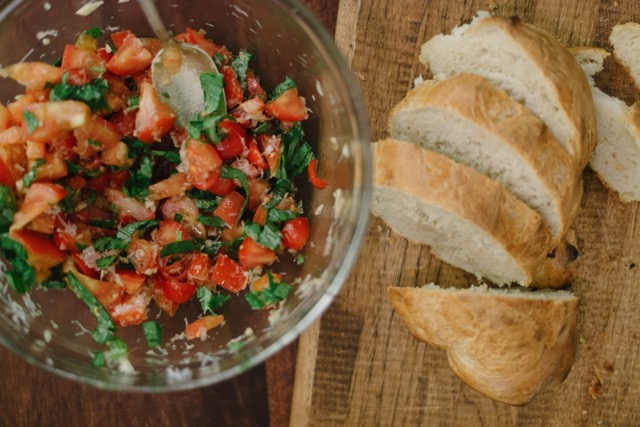
Step 7.  Serve your hot, fresh bread to whatever lucky humans are near you.  I ate it with tomato-bruschetta-mix for a light dinner.

DSC 5894 1024

DSC 5901 1024

The Easiest Homemade Bread:

  • 1.5 tbsp salt
  • 1.5 tbsp active dry yeast
  • 6.5 cups flour
  • 3 cups warm water
  1. Pour 3 cups warm water into large resealable container
  2. Add 1.5 tbsp salt
  3. Add 1.5 tbsp active dry yeast and stir.  Wait 2 minutes until you start to see tiny bubbles.
  4. Add in 6.5 cups of flour.  Just dump it all in. And stir with your hands.
  5. Cover loosely and set aside for 1-2 hours while the dough rises.
  6. After dough rises, punch it down if needed and seal container tightly.  Keep in the fridge overnight.
  7. Break off about one third of the dough to make one loaf of bread.  Place on any baking sheet/pan/cast iron pot/etc. And bake at 450 degrees for 30 minutes.  I usually crank this up to 500 degrees for the another 5 minutes.  Depending on your oven, if it looks like its burning, take it out earlier.  If it looks doughy, leave it in a few more minutes :)
  8. Serve with absolutely anything and it will be delicious.  I love it with butter and honey.  Or bruschetta (recipe below.)  Or with pulled pork.

Bruschetta mix:

  • 7 roma tomatoes
  • 3 cloves garlic
  • 1/4 shallot
  • healthy pinch of kosher salt
  • generous drizzle of olive oil
  • slightly less generous drizzle of balsamic vinegar
  • 10ish leaves of fresh basil
  • Handful of fresh parmesan cheese grated
  1. Mix ingredients together and serve on crispy bread.  Enjoy!

The day I microwaved broccoli . . .

DSC 7663

I did not grow up in a cooking family.  We rotated restaurants nightly: Luby’s, Chinese, Barbecue.

So while most foodies turn up their noses at cream-of-mushroom-casseroles . . . I never had one.  Overcooked pot roast? Not part of my childhood.  The rejected food trends of the 80’s are new territory for me.

I was in my 20’s when I discovered my love of cooking.  Honestly, Gourmet Magazine (RIP) gave me my education.  Ninety percent of the recipes were over my head, but I picked up important tips:

  • Pick good ingredients and let them shine
  • Cook tough meats low and slow for as long as you can
  • Cook fish as little as possible 
  • You’re a fool if you do anything other than roast your veggies.

Roasting vegetables makes them crispy and slightly caramelizes them.  I honestly think roasted broccoli tastes like popcorn.  I devour it.  So 15 years in the kitchen, I have never cooked vegetables any other way.  I roast sweet potatoes. I roast green beans.  I even roast tomatoes.

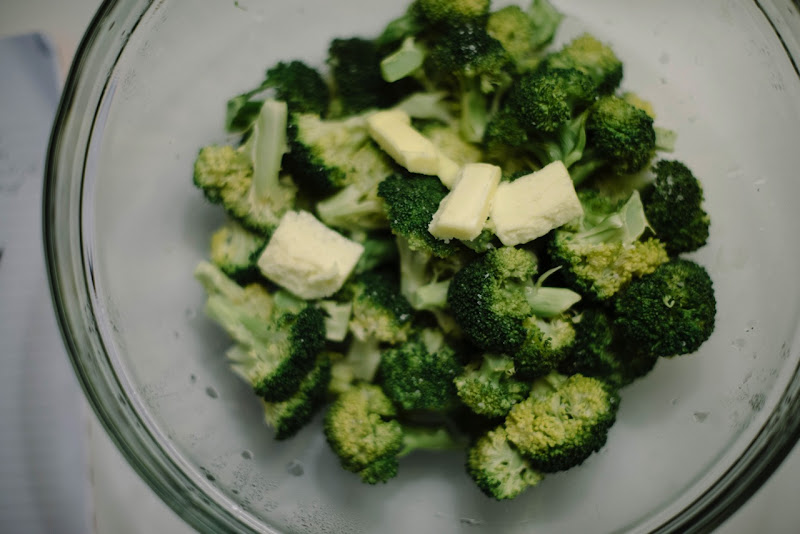
Then one day, my mother-in-law was giving baby Jack a plate of broccoli and I snagged a piece.  It was so soft!  It was so tender!  It was bright green and delicious!!!  I thought she must have some secret recipe, but she just looked at me with a cocked eyebrow and said “I microwaved it.”  MICROWAVED BROCCOLI!!!!  I want to sing it from the rooftops.  

Now I am no fool . . . I understand that microwaved broccoli is the pedestrian way to steam it.  I could whip out a steamer pot and get the same results.  But that would require more pots.  More cleaning.  More effort.  I can microwave these beautiful little green florets in one glass bowl and season with butter and salt.  Delicious and so much easier to chew for the the little ones.

And if microwaved vegetables is a horrible memory from your childhood, then just skip this post :)  There are about 8000 other posts of roasted veggies to delight your crispy-edged-cravings.

DSC 7659

Microwaved Broccoli

I feel silly writing out a recipe for this, but I did have a surprising amount of questions for my mother-in-law when I attempted this solo.

  • 2 big bunches broccoli
  • 1/2 cup water
  • 2 tablespoons butter
  • lotsa salt :)

Cut broccoli florets off the stems and place in large glass bowl.  Pour in a little water and cover.  Microwave for 7-8 minutes.  Remove and stir in butter and salt. 

Barbecue Pulled Pork

Thumb DSC 7295 1024

When I’m at the grocery store, I usually have the three criteria running through my head:

  1. Can baby jack chew it?
  2. Does it cost less than a million dollars?
  3. Can I make it with less than 15 minutes of effort?

Last week I was staring at the butcher blankly.  I saw pork shoulder.  They were cheap.  I figured I could cook a pork shoulder low and slow and it would taste good and be tender enough for Jack.  I planned on buying a jar of barbecue sauce, but I forgot (I think this was the day Grace demanded she wear a bike helmet to the grocery store then proceeded to head butt Jack Jack with her princess helmet as we were cruising up and down the aisles.)

I got home and said a bad word when I realized I forgot the one thing (barbecue sauce) that was supposed to make my dinner taste good.  Then a quick Google search, and I realized I can make my own barbecue sauce with stuff I already had in my kitchen.  Ketchup + Brown Sugar + Worcestershire Sauce = Barbecue Sauce.  I added in some garlic and some apple cider vinegar, but I think it would have tasted just fine without it.

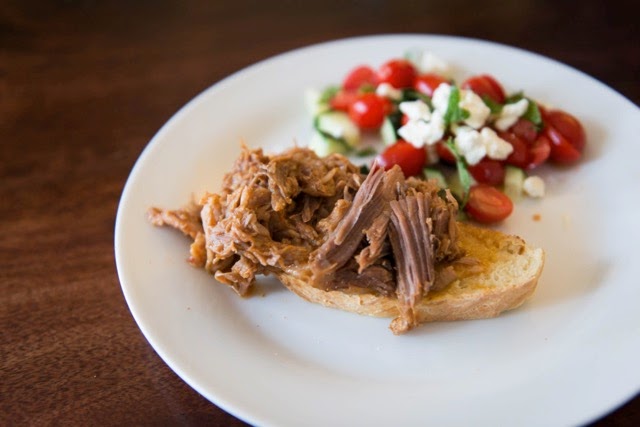
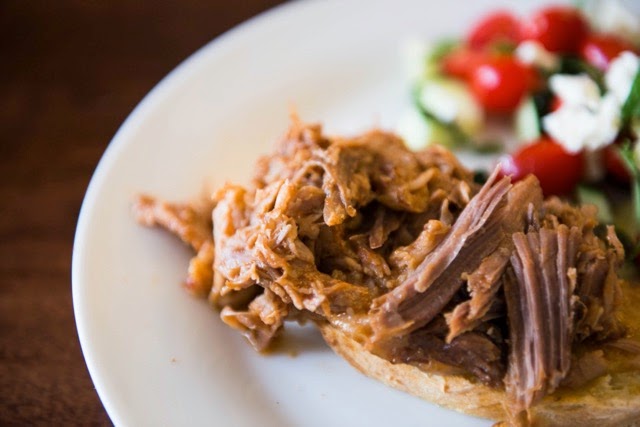
I literally put the entire pork shoulder in a big (oven safe) pot.  I glugged a lot of ketchup and a little bit of brown sugar and Worcestershire sauce.  A sprinkle of apple cider vinegar and some whole garlic cloves.  Then I put the entire thing in the oven for 6-ish hours at 275 degrees.  I pulled it out and shredded it with two forks.  Prep took about 3 minutes.  Shredding took another 3 minutes.  Dinner = done.

Thumb DSC 7298 1024

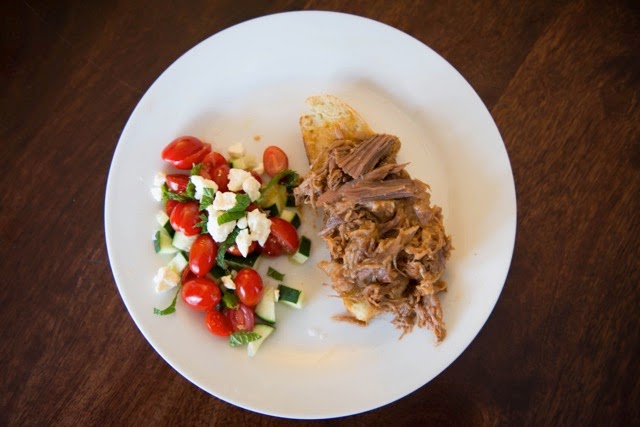
I served on thick sliced bread (recipe coming soon!) with a simple salad: tomato, cucumber, feta cheese, mint.

Thumb DSC 7292 1024

Barbecue Pulled Pork

Ingredients:

  • 3 - 4 pound pork shoulder
  • 2 cups ketchep
  • 1/2 cup brown sugar
  • 4 tablespoons Worcestershire sauce
  • 2 tablespoons Apple Cider Vinegar
  • 6 cloves garlic

Directions:

  • Pick a large, oven-safe pot.  This can be stainless steel or copper or cast iron or . . . anything that doesn’t have nonstick coating or have plastic handles.  You also want it to have a lid to keep all the goodness inside.
  • Place all ingredients in the pot.  :) No certain order other than the pork should be on the bottom of the pot. 
  • Place pot in the oven at 275 for 6-ish hours.

Genius Mom Tip: Banana Pancakes

NewImage

Cup of Jo is a blog I read every. single. day.  Joanna Goddard, the blog’s creator, has become my digital-big-sister of sorts.  Whether she links to fascinating articles or discusses make-up tips, I’m always hooked.  She also has two small sons and I can’t tell you how much I have learned from her heartfelt struggles to her genius parenting tips.  These two-ingredient Banana Pancakes that she shared grace our table about 2x a week.

These pancakes are literally eggs and banana.  That’s it.  Mash them together and pour into a greased frying pan.  (I mash 2 large bananas with 4 eggs.)

I’ve never met a kid who doesn’t like a banana, but my daughter can be finicky about her eggs.  “They are too squishy!  What’s that jiggly part?!”  So these pancakes get some morning protein in their little bodies, and they feel celebratory.  I have been known to sneak into their bedrooms and say “GUESS WHAT!!???? We have Banana Pancakes for breakfast!!!!!”  Lots of squeeling and running ensues.  Baby Jack has taken to yelling/requesting “Nana Cakecakes!"

Photo by Yossy Arefi for Cup of Jo

Roasted Shrimp + Caprese Salad (with BURRATA!)

DSC 6947

Sometimes it is great to indulge.  Give into your wildest imagination.  Make it a reality.

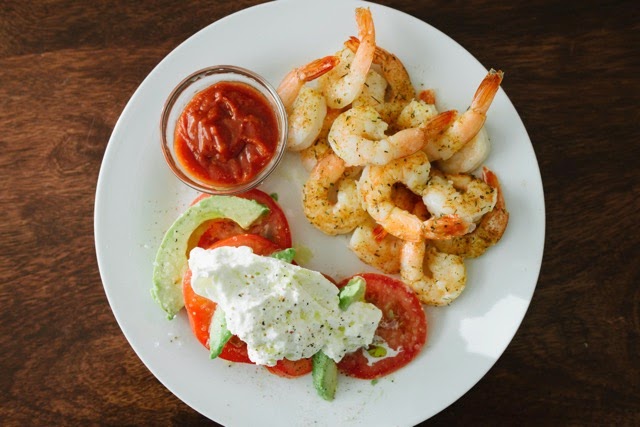
One Monday afternoon, I thought, “I want shrimp.  Fresh shrimp dipped in spicy sauce.  AND I want juicy tomatoes on the side.  WITH Burrata.”  So I drove my crazy monkeys to the grocery store.  I told them we were eating shrimp and the best-freaking-caprese-salad-in-the-world.

Let’s take a moment to discuss Burrata.  Imagine if Mozzarella and Cream Cheese had a fancy love child.  It elevates.  It seduces.  It. Is. Burrata.  

We ate it.  It was divine.  Dinner still only lasted 5 minutes and it was very loud.  But I got to eat my dream dinner on a Monday.  Cheers to life!

DSC 6949

DSC 6965

Roasted Shrimp:

I bought 2 lb. fresh (raw) shrimp, shelled.  I spread it on a roasting pan and drizzled with good oil and salt.  Completely optional, but you can shake a few herbs on there.  I think I did Thyme and Oregano and some Old Bay for John.  Roast in the oven at 400 degrees for about 10 minutes.  Maybe less.  Pro tip: You want the shrimp to curl like the letter “C”.  If they curl all the way into a letter “O” they are cooked a little too much.  See the kids plate for an example of shrimp cooked a little too thoroughly.  (and I bought the cocktail sauce premade and it was delicious :)

Caprese salad:

Slice juicy tomatoes and avocados.  Top with burrata cheese and thank the Lord you are alive.  Drizzle with good olive oil and salt and pepper.  Add some basil if you have it (i didn’t.)

Skirt Steak with Blue Cheese

DSC 6762

Skirt steak is one of my 15-minutes-or-less dinners.  And let’s be honest, this is more of a “meal idea” than a recipe.  The thin steak cooks up quickly, and the other raw ingredients are added to the plate. Dinner. Done.

Weird quirk about me: I have a hard time chewing steak. Flank steak is delicious and fast, but it’s always too tough.  I’ve had good luck with skirt steak.  So if there are any other flat-toothed eaters out there, skirt steak might be your new food friend.

Instructions:

1. Heat oil (coconut/vegetable/etc) in a VERY hot cast iron pan.  

2. Pat steak dry with a paper towel and give a very generous sprinkle of salt and pepper on both sides.

3. Cook steak for about 4 minutes each side.  (Adjust to personal taste, but this works for me.)

4. Plate and top with crumbled blue cheese.  Serve tomatoes and avocado on the side with a drizzle of good olive oil and flaky Maldon salt

Kid tip: if your child has zero molars they will have a hard time with steak :) I serve Baby Jack leftover salmon when we eat steak.

DSC 6757

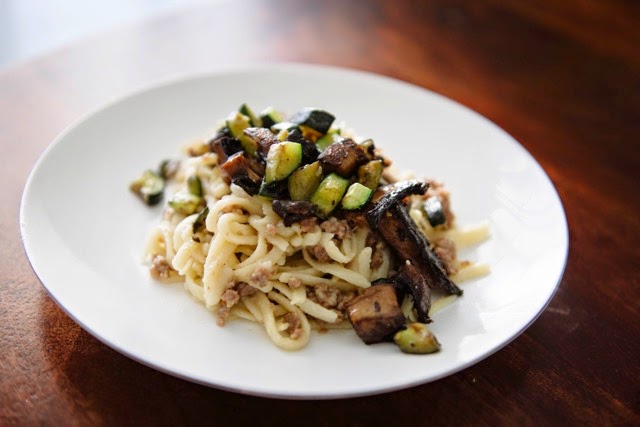
Creamy Pasta with Sausage and Roasted Veggies

DSC 6824

This has become my favorite way to cook pasta. One pot, people! The pasta is cooked directly on top of the sausage and I use chicken broth instead of water.  So creamy, without using any cream.  It literally tastes like butter.  

Then I roast some veggies on a tray in the oven and serve them on top at the last minute.

Kid Tip: Use scissors to cut up their pasta into 1-2” pieces.  They can just shovel it into their mouths with much less mess.  (if that sounds complicated, its not.  Just edward-scissor-hands their plate before you hand it to them.)

Ingredients:

  • 1 pound crumbled sausage (feel free to substitute ground turkey or ground beef)
  • 1 big bunch linguine (I measure by making a circle with my pointer finger and thumb. The pasta fits in there.)
  • 3 cups chicken broth
  • 3 small zucchini, chopped
  • 10 - 12 small mushrooms, chopped
  • Vegetable oil, salt, pepper to taste

Directions:

  1. In a large stock pot, brown the sausage over medium heat until cooked through completely. 
  2. Add the raw pasta directly onto of the cooked sausage. I usually break it in half.  
  3. Add 3-ish cups chicken broth and give a gentle stir (you want the majority of the pasta to be covered but not drowning/floating.) Put on high heat until the broth comes to a boil.  Then put on low heat for 15 minutes with the pot lid on. 
  4. On a foil-lined cookie sheet, spread raw veggies.  Drizzle with vegetable oil or olive oil (i use both even though i know olive oil isn’t supposed to be used at high temperatures) and a generous sprinkle of salt and pepper. Roast at 400 for 20 minutes.
  5. Open the lid on the pasta. If there is still a lot of liquid, just take the lid off, give it a good stir and cook for 5 more minutes.  If the pasta doesn’t taste done and there is no liquid left, then just add a little water and leave the lid on for 5 minutes.
  6. Serve creamy, sausage pasta with roasted veggies on top.

Genius Mom Tip: Spinach Smoothies

DSC 5872

I should have titled this “The Smoothie All Other Mom’s Knew About But Me.”  Apparently spinach smoothies are a thing.  I didn’t know!  Where have I been!?

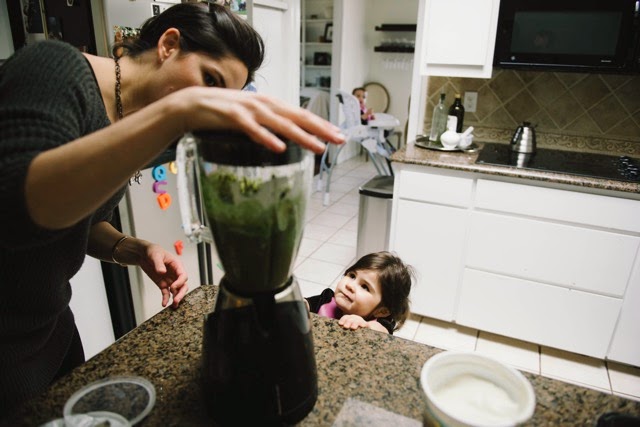
My kids are pretty good eaters, but neither of them will eat any sort of leafy greens.  I have tried putting spinach into spaghetti, NOPE!  I have tried spinach in quesadillas, NOPE!  But the second I say, “Let’s make smoothies!” they both come running/waddling/tripping.  I have no idea who told me about this smoothie.  If it was you, thank you!

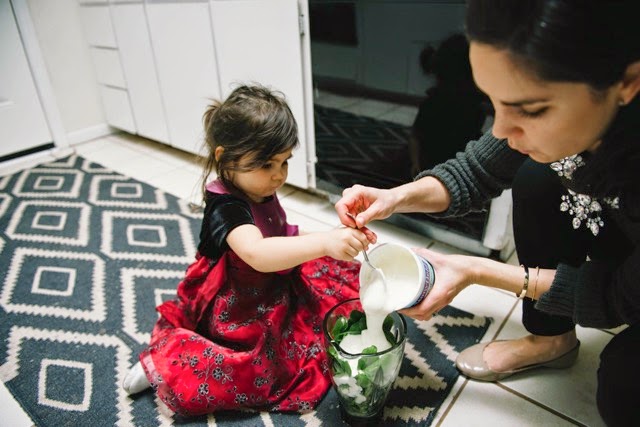
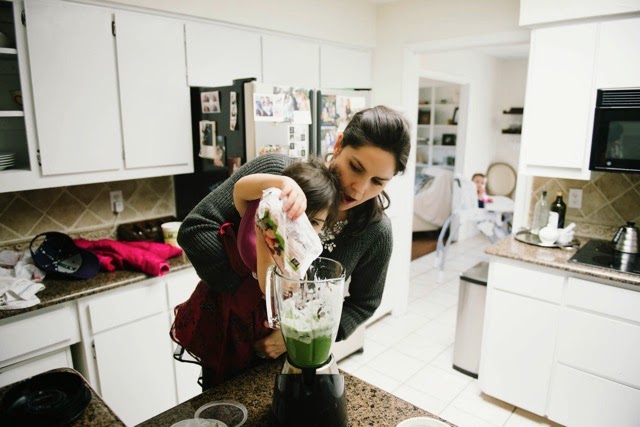
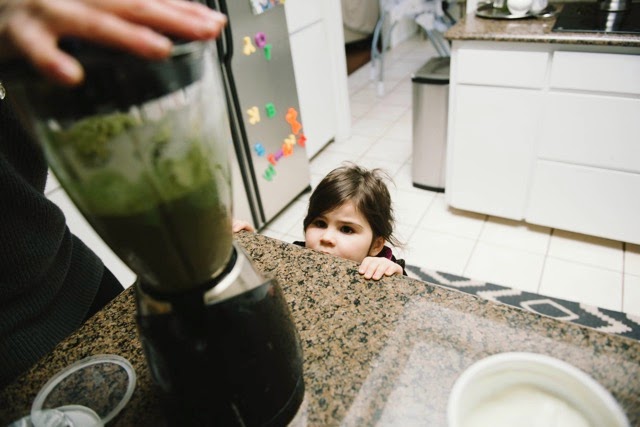
As with most things in the kitchen right now, they go better if Jack is not there.  He is left out of the cooking action.  I feel bad for about negative 2 seconds.  Grace is pretty good about avoiding life-threatening activities, so she gets to help. She is giddy about shoving spinach into the blender.  Now we’re talking!

Step 1: Fill Blender about 3/4 full of spinach. Then dump roughly a cup of whatever yogurt you like (I use full-fat-creamy-vanilla yogurt).  Blend this up together.  If you add the frozen fruit now, the spinach turns to icy clumps.  This is not good.  

DSC 5792

DSC 5781

Step 2: Dump in about 2 cups frozen berries on top of spinach/yogurt mixture.  Blend it up.  Done.  So healthy!  So good!

DSC 5802

DSC 5810

DSC 5813

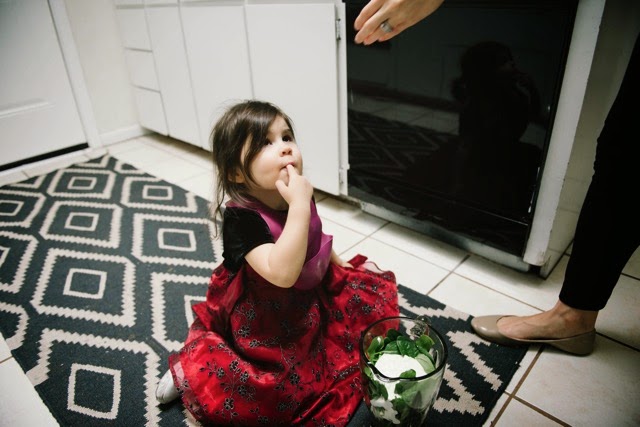
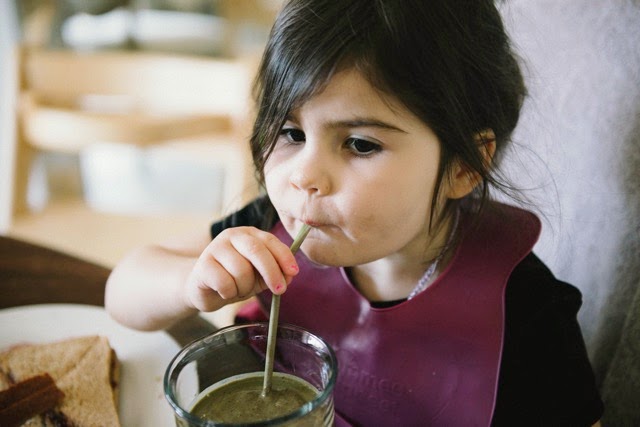
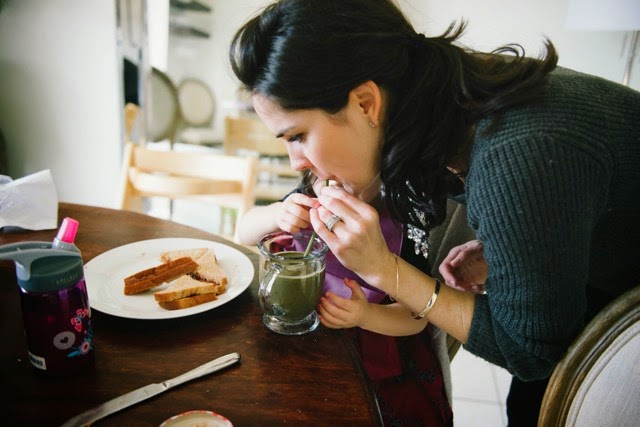
Serve with a straw or a spoon!  These are pretty thick, so you might have to help the little ones get the sucking started as I demonstrate below :)

And yes, I’m a weirdo, and I don’t have any kiddie cups.  I give them smoothies in glass. They have broken.  Whatever.

DSC 5844

DSC 5861

DSC 5840

Spinach smoothies!  The best way to feel better about serving your child their 8 millionth PBJ :)

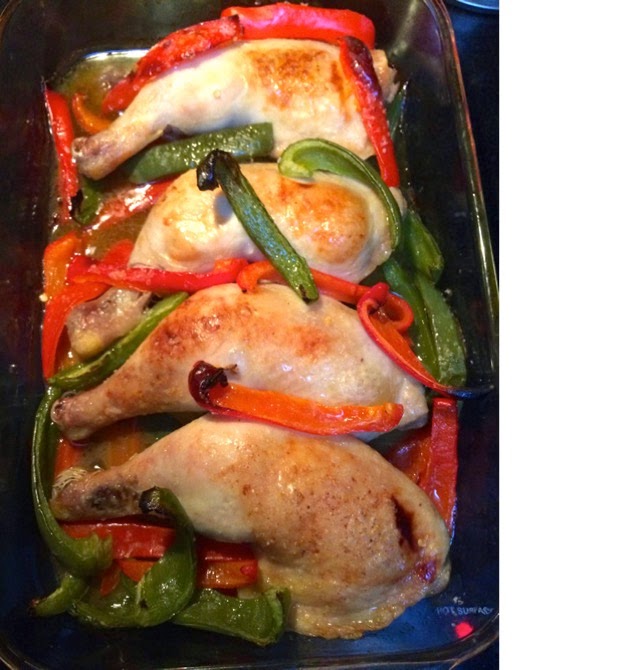
Oven-Roasted Chicken and Peppers

Chicken and peppers

These recent recipes truly capture my outlook on life these days: Keep everything simple and savor the natural flavors (of food and life.)  

This Oven-Roasted Chicken is as simple as it gets.  We call it “Chicken on the Bone” and the kids get a kick out of eating it with their hands.  

A quick reminder on my approach to buying meats:

  1. Buy Fresh (i.e. speak to a human to get your meat)
  2. Get bone-in when available
  3. Chicken skin is delicious. Leave it on. 

I used whole chicken legs for this recipe, but that’s a matter of personal taste.  If you like chicken breasts, feel free to use those instead.

Step 1: Lay chicken in a pan or cookie sheet.  Surround with roughly chopped bell peppers.  I keep the slices bigger as they will stay in the oven for a while.  The bigger size helps them not get soggy.

Step 2: Drizzle about 2-3 tablespoons vegetable oil and a very generous sprinkle salt and pepper.

Step 3: Roast at 400 degrees F for 45 minutes. The skin should be golden and crispy.  (Probably 30 minutes for smaller chicken thighs, or chicken without the bone.) 

Sometimes, we eat chicken and peppers all by themselves.  Sometimes, I serve over rice. Here’s to simple life and simple dinners!

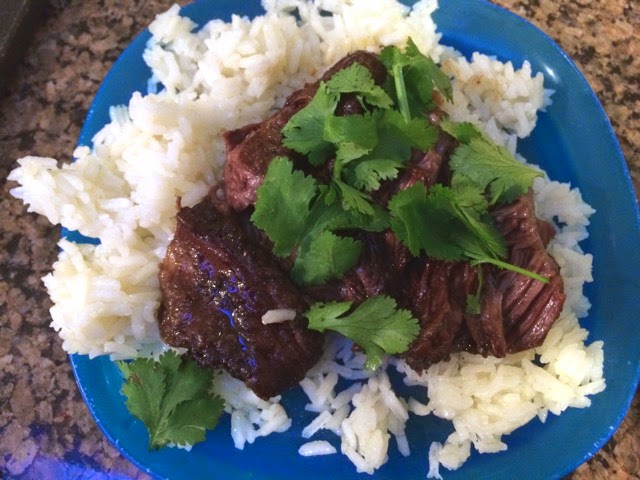
Braised Short Ribs (aka Nap-time Short Ribs)

IMG 9993

Sometimes I tackle dishes over and over, and I can’t seem to get them right.  A good Short Rib has been one of those dishes for me.  At some point, I just gave up trying to do it fancy.  I dumped a few things in a pot and put the heat lower than I ever thought safe for cooking meat.  Several hours later, I realized I had cracked the code.  I make these short ribs about once a week, because they are so easy.

I call them my nap-time short ribs: I take about 10 minutes to prep these when the kids go to sleep around 1 pm, and throw them in the oven. I pull them out around 6 pm, and dinner is ready. (I serve them with rice, but I can cook that anytime.)

These are the exact ingredients: (but I explain how easy substitutions are below)
  • 3 pounds bone-in short ribs
  • 1 onion
  • 1 head garlic
  • 1 bunch cilantro, leaves and stems chopped
  • 1 cup red wine
  • 1 tbsp. soysauce
  • 1 tbsp worcestershire sauce
  • 3 cups chicken stock/broth
Braising is usually three steps:
  1. Sear the meat
  2. Throw in any aromatics (onions/garlic/fruit/cilantro etc.)
  3. Pour in braising liquid (wine/stock/soy sauce etc.) and cook low and slow
I don’t stray from this formula.  But first, a few notes on the pot to use.  The same pot is used to sear the meat on the stove and then braise it in the oven. You can use cast iron, enameled cast iron, stainless steel or a copper pot as long as it doesn’t have a wooden/plastic/synthetic handle.  If your pot has a plastic/rubber handle it will melt in the oven.  It will smell bad.  You don’t want this to happen.  You also want the pot to have a lid so you contain all the goodness while its cooking in the oven.

Step 1: Sear the Meat
So now that you have an oven-safe pot . . . Heat some oil until it is VERY hot.  I test this by sprinkling a tiny bit of water when I think it is hot enough.  If the water sizzles right away, you are ready to go.  Give your short ribs a generous sprinkle of salt and pepper and put them in the hot oil.  Seer short ribs on all sides.  This might only take about 1 minute per side.

When I promised you terrible iPhone pictures on this blog I wasn’t kidding.  Here is my meat searing in all its phone-photo glory:

IMG 9966

Step 2: Aromatics
This part is optional.  Anything you put in will make these ribs better, but if you don’t put anything, they are still delicious.  This particular day I sliced an onion  and threw in about 6 whole garlic cloves (peeled).  Everything gets so soft and juicy that big hunks of onion/garlic in the final dish are an awesome thing.

IMG 9971

I also chopped up the entire head of cilantro, stems included and threw them in (I must have taken this picture before I added the cilantro.)  Good rule of thumb, if you are cooking the cilantro, you can use the stems.  If you are just sprinkling it on top of a dish after it has cooked, only use the leaves.

In the past I have thrown in a chopped pear after reading this post.  I have also completely skipped this step, because the only thing I had in the house was a loaf of bread.

Step 3: Liquid
I am very scientific about this step.  This is exactly what I did: 2 glugs of red wine from the bottle I had open. 1 smaller glug of soy sauce. 1 more small glug of Worcestershire sauce. About 4 glugs of chicken stock (I like this kind but anything is fine.)  Basically add liquid until your short ribs are covered about 50% with liquid.

Then I put a lid on the pot, and put it in the oven at 275 degrees F for roughly 5 hours.  This temperature is SO LOW and therefore SO FORGIVING.  Five hours is what works with my schedule.  If you needed to leave it in for 6 or 7 hours it would probably be just fine.  If you needed to take it out at 4 hours because everyone is starving I bet it would be fine too.  Open up the lid and take a fork to the ribs.  You want them to fall apart when you pull at them.  If they do that, they are ready!

I served over rice and sprinkled a little bit of my extra cilantro on top.  These would also be great over sweet potatoes.

This is Baby Jack’s dinner plate.  Braised short ribs are particular nice for humans without many teeth because the meat is SO tender.  It shreds itself when they pick it up.

IMG 9990

Genius Mom Tip: Frozen Peas

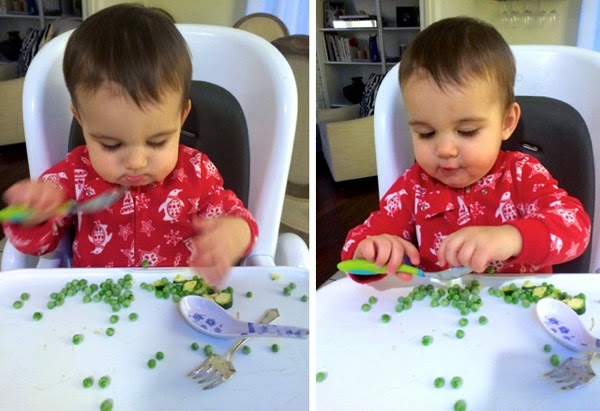
Jack and peas

My least-foody friend gave me a tip that has changed my life: Babies love frozen peas.

Just serve the peas straight from the freezer bag - no cooking required.  Great for teething.  Great for something fun to touch . . . ooooh so cold, but wait! So squishy.  The peas melt in your mouth in about five seconds, so they are easy for babies to gum and eat.

Both of my kids usually flip their shiesters about 10 minutes before I have dinner ready.  What do I do with crazy monkies screaming for food? Give them frozen peas.  And when they get old enough I give them a few different utensils with which they can battle the peas.  Keeps them busy and contained.  When they are so hungry they want to eat their arms off, they gleefully scarf down peas.  Win Win Win x10.

*** Disclaimer: I have zero medical background and I have no official opinion on when to start solids.  In my personal experience, the frozen peas entered my daily arsenal around eight-months-ish.

And yes, those are Christmas jammies in March.  That’s how we roll.

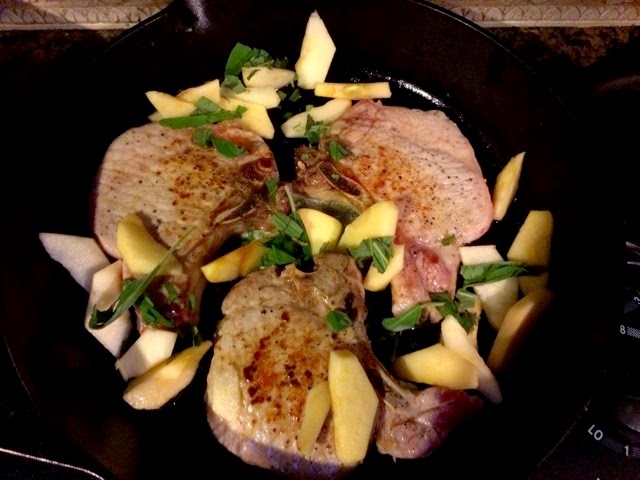
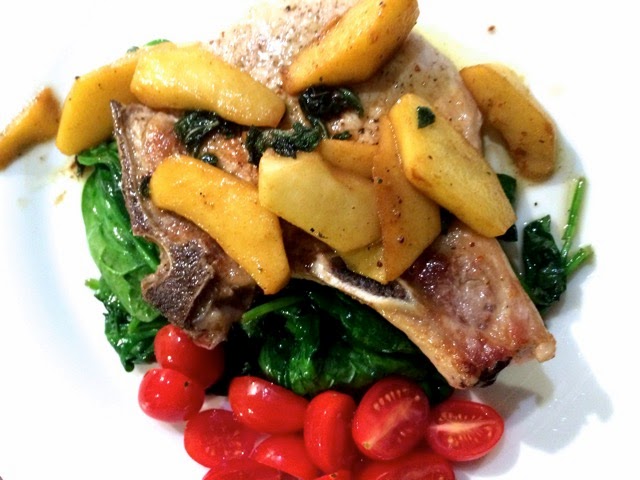
Pork Chops with Apple Sage Butter

IMG 9918

This recipe looks fairly fancy (well, fancier than a can of beans . . . the bar is set pretty low around here.) But honestly this entire dinner was cooked in 20 minutes. Twenty minutes which also included pulling crayons out of someone's mouth, giving someone else a timeout for repeatedly hitting her brother in the face, changing a diaper, helping someone who fell off the potty . . . and opening up a bottle of wine. You get the picture.

First a few notes on buying pork chops:

  • Only buy fresh. You should need to talk to a human to get your meat.
  • At my grocery store you can either choose "thin cut" which is about 3/4" thick, or "thick cut" which is about 1.5 - 2" thick. My cooking method is slightly different for each, but I've included it below.
  • If you have a choice for bone-in or boneless, ALWAYS CHOOSE BONE-IN. The bone adds a ton of flavor, and the bits right around the bone are the best. Yes, my family and I gnaw on the bones like animals. Family bonding :)
  • And while you are grocery shopping, buy FRESH SAGE. It's in the produce section. Sage should look like leaves on a stem - not flakes in a jar.

Okay . . . now for how to cook it. As with all meat, I like to give it a good sear and then cook through.

If possible, bring pork chops to room temperature before you start cooking. Ideally, you don't want them right out of the fridge (but you do what you have to do.) Pat them dry with a paper towel and give them a generous sprinkle of salt and pepper on both sides.

In a cast iron skillet, heat some vegetable oil over medium/high heat until VERY hot.

Add pork chops to the pan, and you should hear the sizzle right away. Now DON'T TOUCH for 3-ish minutes. If you move them around they won't get that nice brown sear you want. After 3 minutes (or whenever you see one has a nice brown sear underneath) flip it and do the other side for the same amount of time.

During this time, peel and chop an apple or two (for cooking I like a tart apple like a granny smith.) This is also the time to wash and pull sage leaves off the stem.

For thin-cut pork chops: once both sides are seared, I just leave them in the pan over medium heat for about three more minutes and this should cook it through just fine. (I have been known to cut open a piece to make sure it isn't bright pink inside. A little pink is fine as it will continue to cook for awhile.) Remove pork chops to a plate.

For thick-cut chops: I put the whole cast-iron pan in a 400 degree oven for about 10 minutes. Then you can do the next step in a separate pan while the chops finish cooking through.

In the same hot pan with all the leftover pork chop goodness, add quite a bit of butter (I would say one tablespoon for each pork chop). As it melts, add the apples and sage. This should all cook together into a nice caramel color in about 3 - 5 minutes. Pour this magic over the pork chops and enjoy how fantastic your entire house smells. 

I try to serve each entree with whatever two vegetables I have on hand.  This day, spinach and tomatoes happen to be the winner-winners. Feel free to serve with whatever your heart desires.  I sautéed spinach (stir in a hot pan with butter for 4 minutes) and sliced tomatoes.  I prepared both of these as the apples/sage were cooking in the butter.

IMG 9922

And here is "the goose" gnawing on a pork chop. We are classy.

IMG 9923

Two years later . . .

Hello? Any lingering readers out there?

It has been about two years since my last post. We have been swallowed whole by this amazing thing called Parenthood. We now have two kiddos. One daughter with a flair for the dramatic, and one son who basically functions as a laid back vacuum cleaner - scarfing down anything in front of him - edible or not.

About once a week someone asks me: "Are you still cooking?"

My quick and honest reply: "We eat a lot of peanut butter and jelly sandwiches. Who wants to read a blog about PBJs?"

(Although I would like to take this moment to remind everyone without children to go make a PBJ. THEY ARE SO DELICIOUS!!! Why did I wait until I had kids to eat them daily?)

Two years later, we are starting to come up for air. I am cooking dinner every night. The kids are in the kitchen with me - either laughing or screaming or dancing or pooping (or all of the above.)

So this is my re-entry to the food-blogging world. I want to document our real-life dinners. Real life with small kids. Real life where I am usually holding a human while I cook. Real life where I have about 15 minutes to cook, and our family dinner lasts less than 5 minutes - start to finish.

The pictures will be terrible. The recipes will be ingredients that can be quickly stacked together into a meal. And the writing will be filled with my honesty/love/frustration. First recipe below . . . 

Fish and Veggies (and Butter)

My tastes haven't changed in the last few years. I still love fish and veggies. I crave salmon almost every other day. I like it simple: seasoned with butter and salt.

I wish I could say we only eat wild salmon. Unfortunately, my husband and I are crazy about the farm-raised Atlantic salmon they sell at Whole Foods. We buy it fresh and cook it no later than the next day. I'm writing this out mainly for my mother. Madre Mia, if you are reading . . . don't buy frozen fish. It will never taste good.

Happy coincidence, salmon is one of the only proteins my son can eat without any help. He has roughly 8 teeth, so pork chops are still a struggle :) But a fillet of salmon can be flaked in between his chubby fingers and gummed in his delicious mouth. Needless to say, we eat a lot of salmon.

And the fewer dishes we have to wash the better. This dinner is prepared on one cookie sheet. I lined it with foil just to make clean-up even easier.

Place fish fillets skin side down. Surround with any veggies you like: mushrooms, red peppers, sugar snap peas, etc. Melt some butter in a bowl (I do about 1 tbsp. butter per fillet of salmon because I don't like to scrimp on the delicious things in life.) Pour butter over the fish and veggies, and give it a VERY generous sprinkle of course kosher salt. Add some pepper if you like it. Bake at 400 degrees for about 12-15 minutes.

There are several elegant ways to tell if fish is ready, but I don't have a lot of time for elegance these days. I just appoint one piece of fish as my sacrificial ugly piece. I flake it with a fork, and when it flakes easily, it is ready to come out. (see middle piece above for ugly flaking.)

Jack inhaled the dinner, then tried to lick his plate. That my friends, is a face covered in butter/salmon juice. We declared it time to take a bath :)

Sweet Potatoes with Brown Butter Sage Sauce

A lot has happened in the last few months. Our baby girl is growing like crazy. Her cheeks are as big as ever and her thighs are extra squishy. Her cuteness (and sleeplessness) has kept us from posting any of our cooking adventures. But we're going to get better.

We also moved into a new home. It is awesome, but the awesome-est part of all is that we inherited a garden. mint! basil! eggplant! jalapenos! and the star of today's post . . . SAGE! sweet sweet sage that begs to be put in a pot of browning butter. Honestly, you could pour this brown butter sage sauce over anything and it will make you want to lick it like a cake batter bowl. But we served it over sweet potatoes, and we are never going back.

and a little look at our growing nugget and the garden . . . we have the privilege of tending to them both.

and now back to business . . . the cast of characters for today's meal:

The process is simple: slice the sweet potatoes with skin and all into 1/2 inch rings. Roast them with a little olive oil and salt for about 40 minutes at 400 degrees. Meanwhile melt butter in a sauce pan until it starts to turn brown. Then remove butter from heat and add chopped sage. The sage will basically fry in the heat and your kitchen will start to smell like heaven. Serve sweet potatoes and spoon brown butter sage sauce on top.

We enjoyed these guys with some grilled chicken thighs and an arugula salad.

Sweet Potatoes with Brown Butter Sage Sauce

Serves 2 very hungry people

  • 3 sweet potatoes
  • 10 sage leaves, chopped
  • 4 tablespoons butter
  • olive oil
  • salt
  1. Preheat oven to 400 degrees.
  2. Wash sweet potatoes, and slice into 1/2 inch rings. Place sweet potatoes on a sheet pan and drizzle with olive oil (maybe a teaspoon or two) and a pinch of salt (i love salt so I use a HEFTY pinch.)
  3. Put sweet potatoes in oven and roast for 20 minutes, flip once, then roast for 20 more minutes.
  4. Melt butter in small sauce pan. When butter starts to turn a light brown color, remove from heat and add sage leaves. The heavenly mixture will bubble and the leaves will start to crisp. This is incredible.
  5. Spoon brown butter sage sauce over sweet potatoes and enjoy!